As we move along this section of Zynchro we will explain each attribute. Please keep in mind that Campaigns are delivered exclusively via (previously created) Smart Groups and can be fine-tuned by locations.
Click on the New Campaign button to create a campaign.
Start and End Date: When your campaign will begin and when it will end.
Smart Group: Select the Smart Group to which your campaign will be delivered. When you select a Smart Group you will see to how many locations and how many players the Campaign will be delivered to.
If you have previously created created a Smart Group and do not see it displayed as an option in your Smart Groups; you must add it as in option for Campaign Manager by going to Campaign manager -> Properties - > Presentations (tab) and clicking on the blue Add button.
Click Save to confirm.
NOTE: The order in which your Smart Groups are displayed on this list is the order of preference in which your players will respond in case that they have conditions that include them in more than one group. A player will only display content for the first group that it is in and that has content pushed to it.
If you currently have content displaying on a player in a Smart Group and you wish it to display content from a different one you can either:
- Ensure that it is only in that second Smart Group
- Reorder your Smart Groups so that the second one is on top of the first one.
Presentation: Once you select your Smart Group the presentation that was previously assigned (in Campaign Manager -> Properties -> Presentation) to that Smart Group will be displayed.
Status: Status can be either Draft/Reserved (if it is still being worked on), Approved (authorized by user with such permissions) or Live (ready for displaying or currently displayed).
Status will be greyed out as “Draft / Reserved” until the Campaign is saved and assets are added to it.
Manufacturer: Choose among previously added options.
You can add (and Edit or Delete) a manufacturer in Campaign manager -> Properties - > Manufacturer (tab). Input name and and click on the Add New button to add.
Brand: Choose among previously added options.
You can add (and Edit or Delete) a brand in Campaign manager -> Properties -> Brand (tab). Fill all required fields and click on the Add New button to add.
Category: This will display automatically according to which manufacturer and brand you selected.
Revenue Class: Choose among previously added options.
You can add (and Edit or Delete) a manufacturer in Campaign manager -> Properties - > Revenue Class (tab). Input desired class and and click on the Add New button to add.
Click Save and Continue button.
You can add Notes if you so requiere by clicking on the Notes button, once you save they will be displayed.
You can now add assets to your campaign. Click on the blue Add Asset button.
Select your assets from the Media Library. Click Save when done.
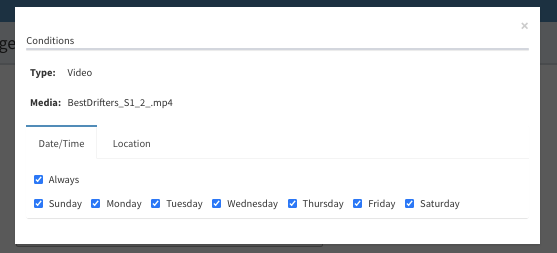
Once an asset has been added you can edit it by clicking on the Edit button, or modify some its conditions by clicking on the Condition button. This button will be green if the asset does have conditions attributed to it.
Once all assets, conditions and variables are added and defined click Save button to save your campaign.
Note: Once a Campign is edited, its status automatically goes to Draft. Modify it to pending approval or approved, according to your permissions and needs.
Once you Save your assets, the Status option is now available. If you have approval rights, you can approve your campaign otherwise you can set it to pending approval.
If it is set to pending approval a campaign can not be pushed to a player. As soon as a user with approving rights does approve the campaign, it will be marked as approved and will automatically be pushed to the players in the selected smart group on the start date of the campaign.
Once a campaign has been approved, then published, once it has expired the status will be shown as Completed.
Once a campaign has been created, you can review all its properties as well as duplicate, edit or delete the campaign (delete only available when a campaign is not live).