
For each client or account that you have, you will need to create a separate one on Zynchro, this allows you to keep everything for each client organized. You can easily switch between clients from the initial drop-down menu when signing into Zynchro or later, by clicking on the gear icon in the upper left-hand side.
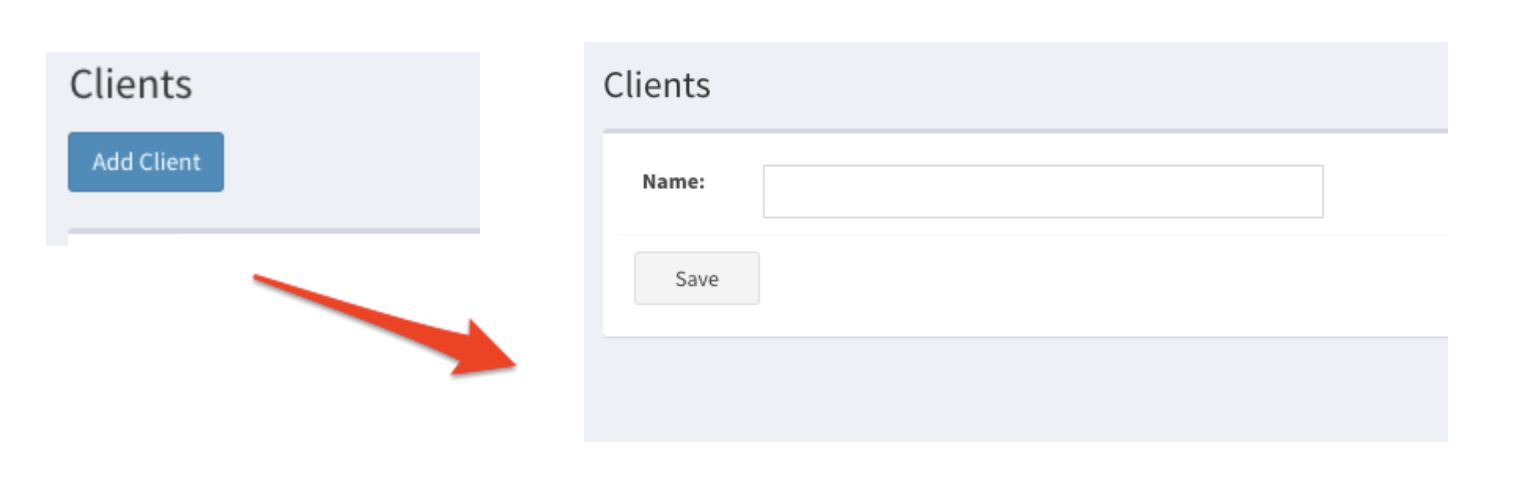
To create a new client click on the Add Client button, name your client, click save when done.
To create a new client click on the Add Client button, name your client, click save when done.
To modify or delete a client, click on the desired button. You can also export a list of all your clients.
Please note: When creating a new client, if you want previous users to have access to the new client, you must assign them to it.
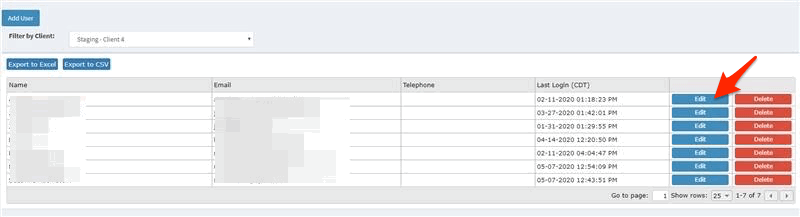
You can do so by going to System Config -> Profiles/Users -> User.
Select a previously existing client (not the newly created one) from Filter by Client drop-down menu. Click on the blue Edit button for the user that you wish to assign.
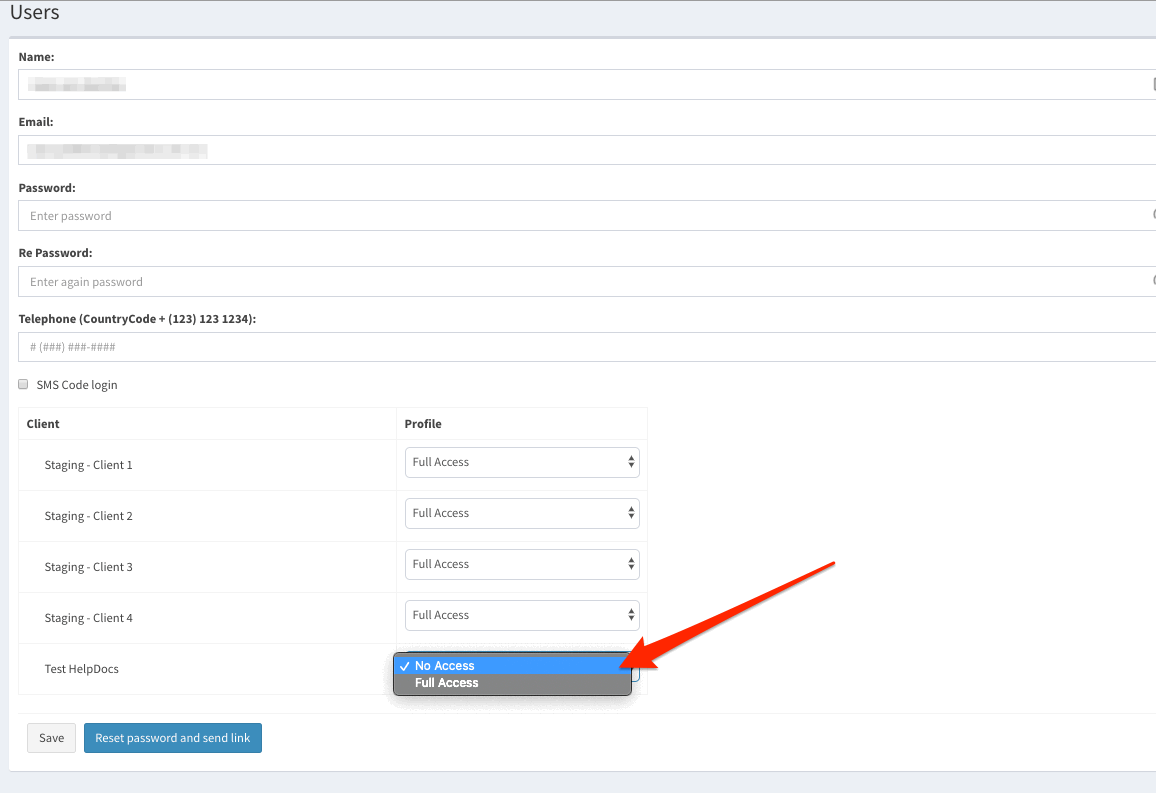
In the Edit screen, find the new client and then select the access that you with your user to have. Click Save when done.
The user will have to log out of Zynchro and log back in in order for the new client to be visible in their account.
* The images used in this guide are for illustrative purposes only and designed to be a representation and/or general orientation of the required steps and/ or existing system and are not in any way designed to represent or guarantee aspects of the project, software and or information from any particular unit or location.